Taking portraits with one light – if you’ve never taken a portrait with an off-camera flash,then you might need to try it, shooting with one light is definitely the best way to get started. The key is that you really have to understand what one light is doing in your image and how to get the most out of it before you can start addingmore light. Today I want to share with you what I believe to be one of the most useful one light setups that you can use on men . You could use it on women of any age to make them look great, it’s probably the one that I use the most in my portrait work and it’s a great one to have in your back pocket whenever you need to take a shot, that’s guaranteed to make your subjects look great.
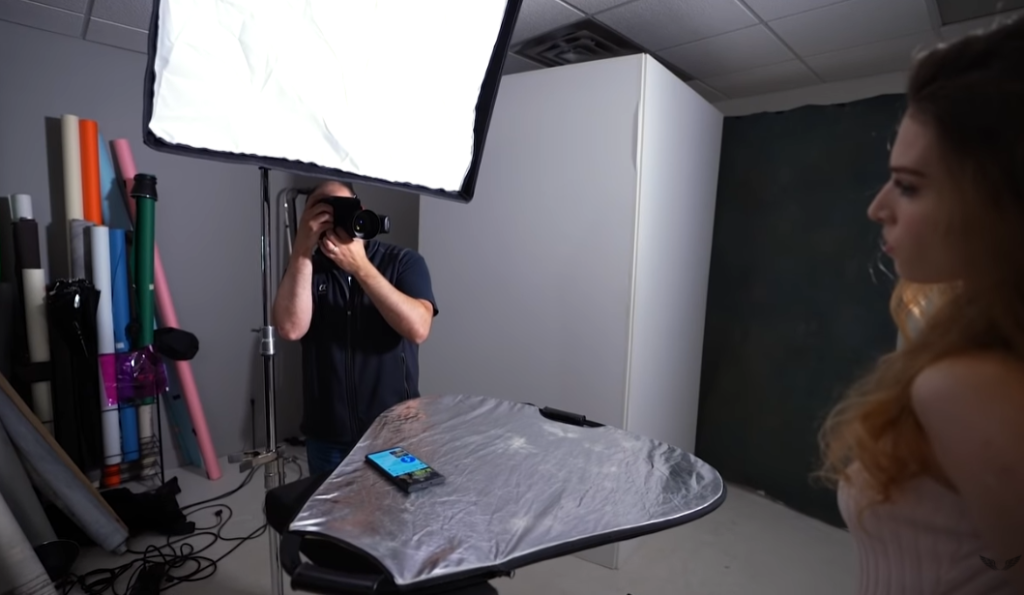
let’s break down how this setup works, the first thing you’ll need to do when taking a portrait with an off-camera flash is to dial in the settings for your ambient light which is the light that is currently available wherever you might be shooting for today’s shoot. I usually use the sony A7R 4 with a dual battery grip, for the lenses I’ll switch between using the sony 85 MM 1.8 and the 90 MM 2.8 G macro to get sharp close-ups.
If you’re taking studio style portraits you’ll want to dial in an exposure setting in your camera that will completely under expose your available light, the reason is that you don’t want any of the light in the room to affect your exposure only the one that is actually being created by that single light source that you’re using and that way you could take that light source and you can move it around , and you can modify it, get your portrait lighting dialed in exactly the way that you want it.
Generally speaking, I start off with putting my camera into manual mode once I get the settings right to under expose the ambient light, I’m not gonna change
them for the rest of the shoot unless the lighting situation in the room changes dramatically. I typically start off with the following settings.
First, I’ll dial in the lowest native ISO value that my camera allows which in this case is ISO 100, your camera might be a little higher like 200, and that’s totally ok, you can just just set that value. since we want to have the best quality results, so using the lowest native ISO will help you do just that well.
Second, then move on to our shutter speed which will need to be at or below the flash sync limit for your camera, I usually have this set at 1 over one sixtieth of a second, but again your camera might allow you to go a little bit higher than that, so check your camera manual lastly. I generally like to have a lot of detail and sharpness so I dial in an f-stop of that fate to get started with.
Third, now all you need to do is to take a shot without the flash trigger, if you’ve dialed in the right settings you should get a shot in camera that is completely dark, what you’ve done at this point is use your camera settings to get rid of the light. that’s in the room your white balance can be set to automatic or you could always dial in a custom white balance using a gray card if you want to be more accurate. Now that we have all that done. we can now introduce our light.
At this point we’ve dialed in our camera settings. Let’s talk about the one light setup that we’ll be using for today for my own professional work . I typically use
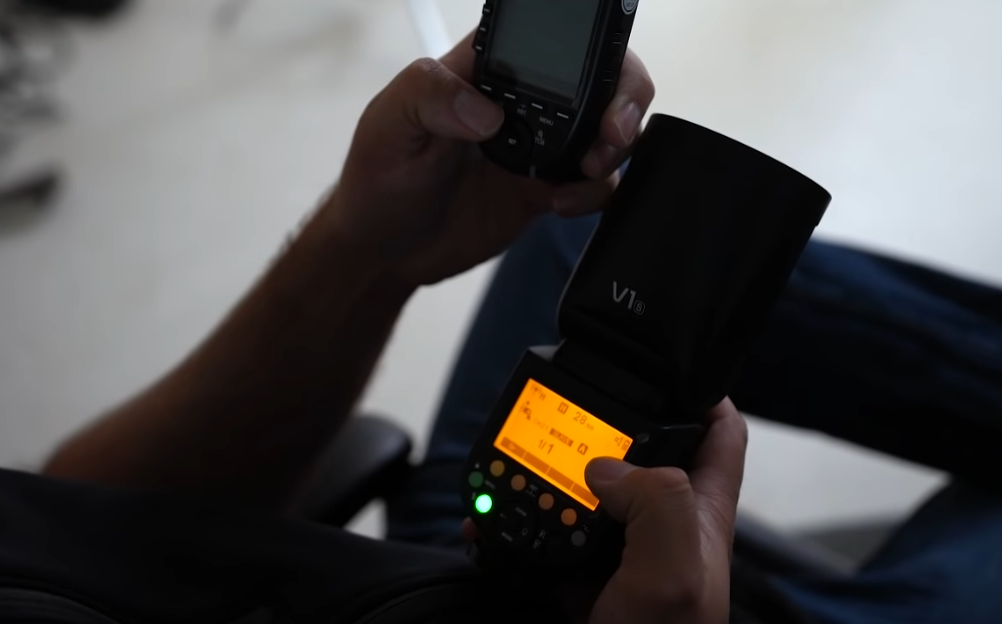
profoto lighting, but I wanted to use a basic light to demonstrate this technique the folks at pur gear were kind enough to send me this godox v1s with their X Pro trigger to show you how this one light setup will work . Godox is actually a great light manufacturer, they have created a lot of great flash light Godox AD 200 pro and some great LED light like Godox vl150, etc. Learn more about Godox story here.
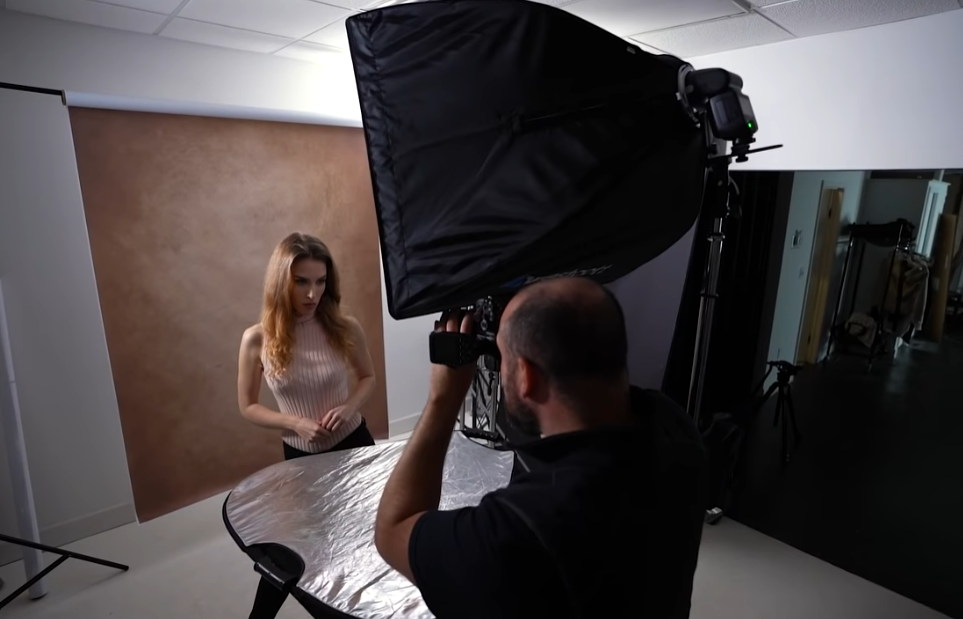
So that’s what I’m gonna be using to take these portraits, feel free to use whatever lights work best for you and your budget in order to soften the light coming from this flash. I have it modified with a Westcott rapid box 2×3 softbox, I really like these soft boxes mainly due to the fact that you can change the mounts on them so you can use them with pretty much any major lighting system out there just by switching the adapter. We’ve got both layers of diffusion to make this light as soft as possible to get started.
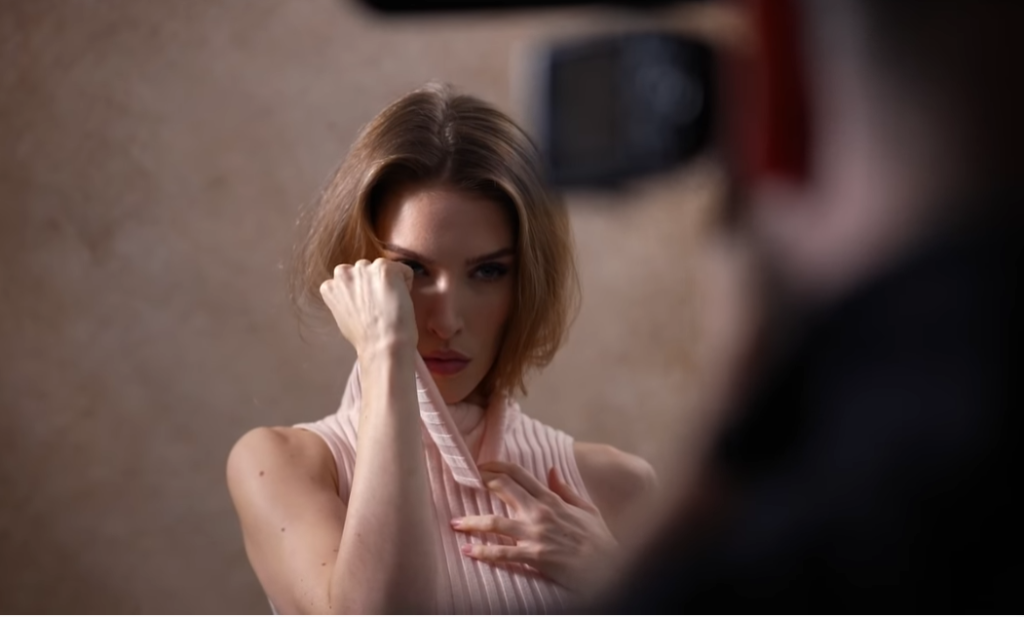
I take my light and place it centered above my subject approximately two to three feet away with the bottom of the modifier lined up just above my subjects nose, and I have it angled slightly downward, I have my model standing approximately three feet away from the background which happens to be this textured brown printed vinyl backdrop from Savage . The distances here give me enough light on both my subject and my background, but feel free to adjust these distances to get a darker or a brighter background . I have the Godox v1 s set to a rounded quarter power and begin taking my shots, your power settings on the flash may vary based on the type of modifier that you have on your flash and how far you place it from your subject and your background,so adjust the power settings to your own personal tastes .
I personally like adding a silver reflector from below to bounce some of that light which softens the shadows on the face,and it provides a beautiful catch light in the eyes to help draw the viewer into the portrait.
.
If you’re an available life photographer that wants to dip your feet into off-camera flash,so this handy setup will give you a great foundation to get some beautiful portraits as a matter of fact, I’ve used some variations of this same setup to make tens of thousands of dollars for my own portrait photography business. I’m curious to know though what’s your favorite one light setup let me know in the comments section below.
.